Saturday, February 10, 2018

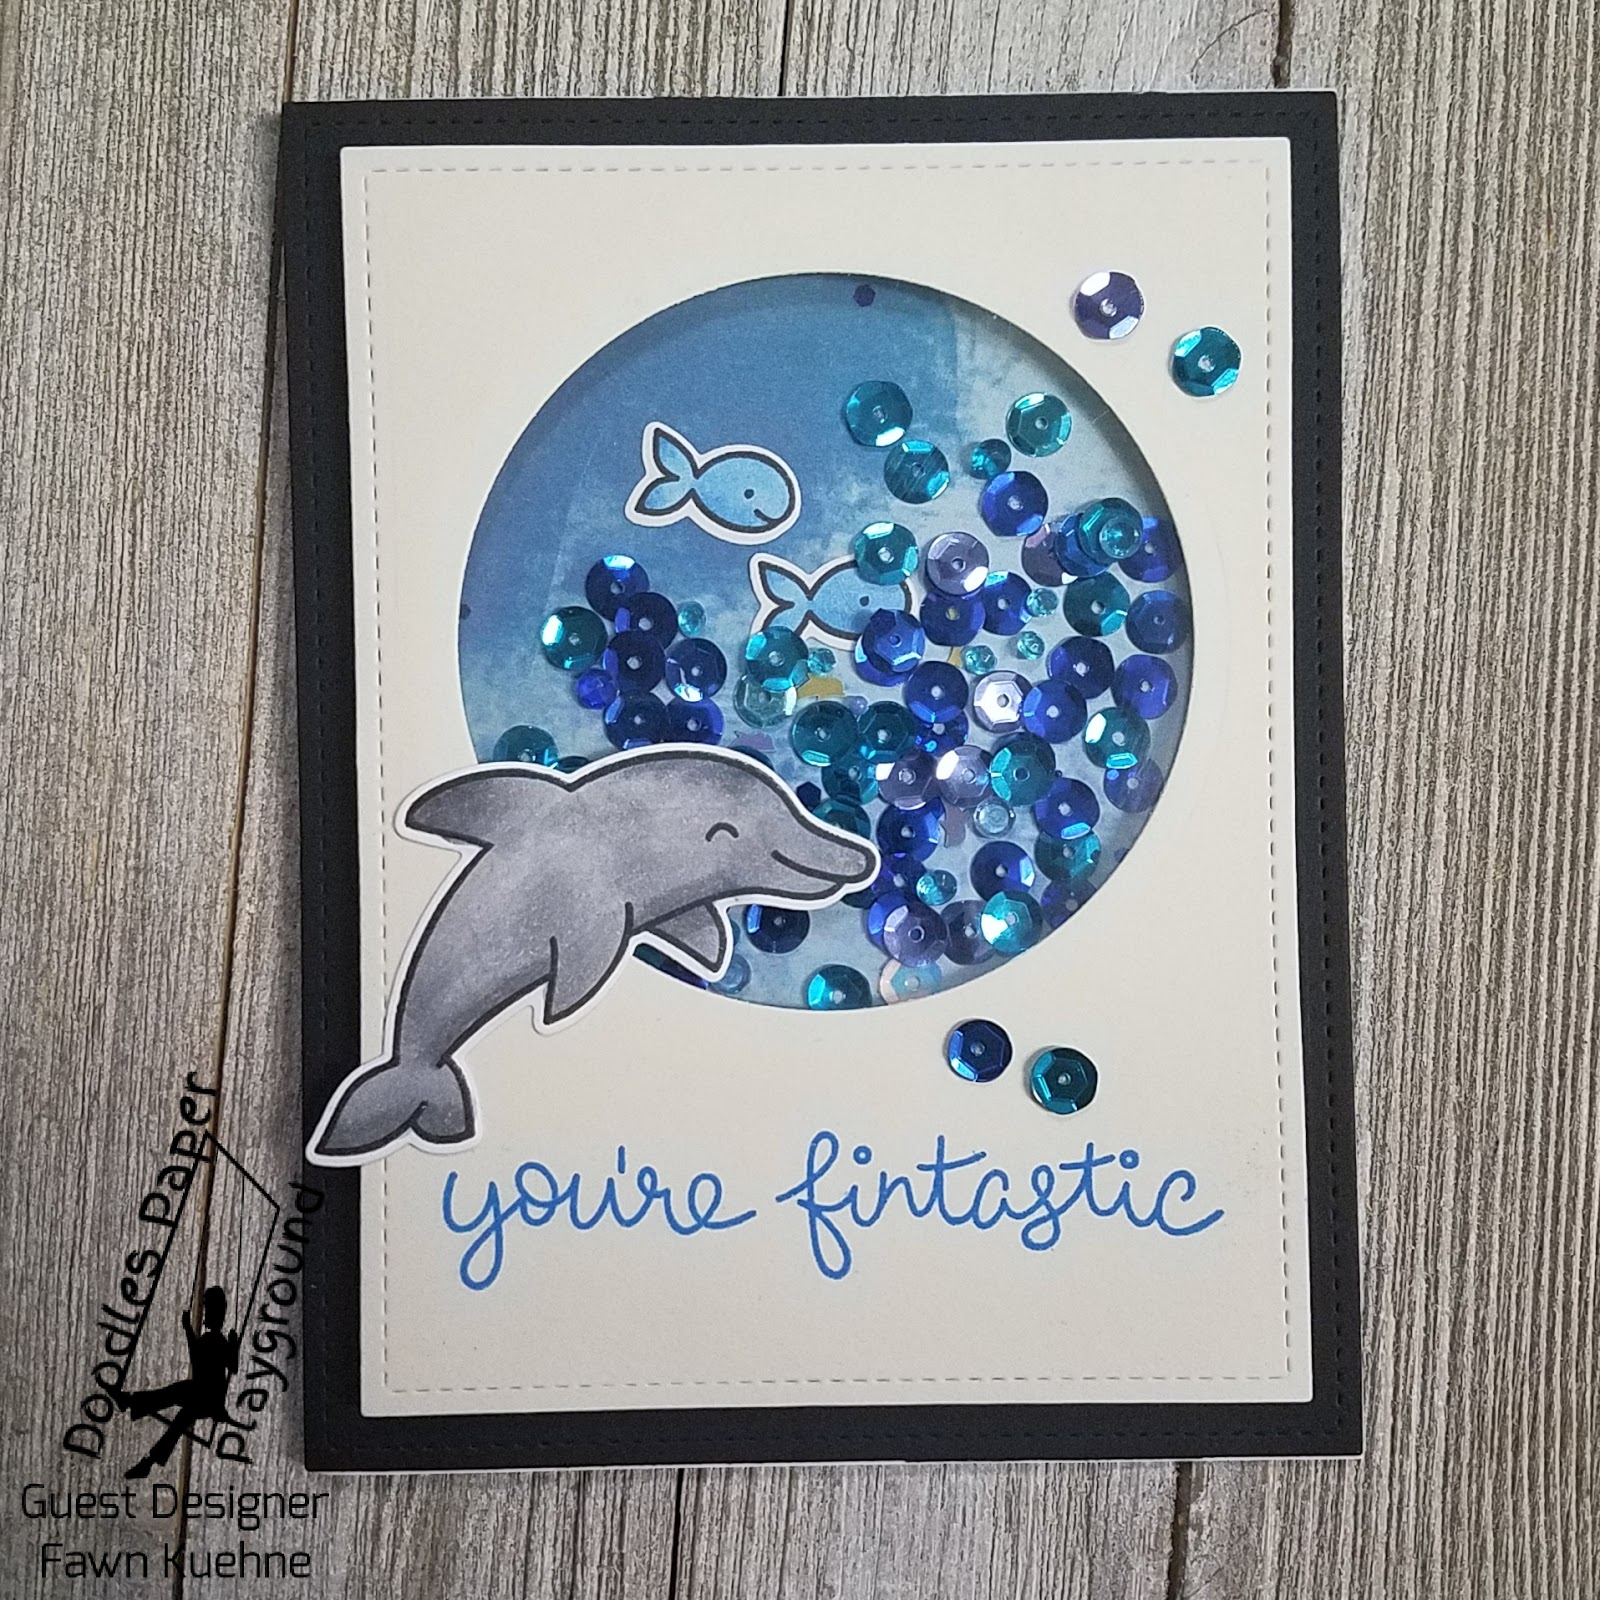
You're Fintastic!

You're Fintastic!


This card was actually pretty easy to put together and turned out great!

I started this card by die cutting all my needed panels and pieces. I used black for my base panel, and a vanilla malt for my top panel. I choose a blue paper for my shaker window back ground since I want it to be water-esque!

I stamped my images and colored them with copic markers and stamped my sentiment on my top panel.


Then I put together my card. I added my little fish to my shaker background so they give a little more dimension to the shaker. For my shaker bits I used Ocean View, one of the new mixes from Doodles Paper Playground - Sparkle Blends February release. I love how this mix has a great variety of blue shades, worked great for my water!

I put the dolphin on the front of the card and added a few more sequins! 


I have a discount code for you if you wanna pick up your own pack of Sparkle Blends!!

EY4JVU Doodles Discount

15% off total purchase at www.whiterosecraftsllc.com - There are more great Sparkle Blends and a large assortment of items for all your crafty projects!

I will be entering this card in the following challenges:

Word Art Wednesday

Thank you so much for stopping by!

Now, Get Out There and Create Something Amazing!!


Friday, February 9, 2018

Stop Dragon Your Feet. . . .

Stop Dragon Your Feet. . . 


Valentines Day is just around the corner so I decided to make this cute dragon valentine!


I stamped my dragon and jewels in copic friendly ink. I like to use my Misti so I can stamp it multiple times to get a nice dark image.


I colored my images in shades of pink and red since this is going to be a valentines card. I used a Scan-n-Cut to cut the images out after coloring them.


For my background panel I used watercolor paper and did a wash of pink and added flecks of pink and red to one side and along the bottom. After I made my base panel I decided that a little black border would look nice so I trimmed down my watercolor panel and created a new black base panel.


My sentiment is cut out from adhesive vinyl. 
I love to do this, you get exactly what you want to say and how you want it to look 
and it is so easy to add to your card.

I layered up my base panels, attached my images and placed my sentiment.


I decided I wanted the jewel that the dragon was holding to be nice and sparkly so I did a layer of red stickles and after that dried I did a layer of glossy accents. . . I think it turned out perfect!

Stamp Set Used:

Don't Forget the Strawberry Jude Stamps moving sale is still going on!

Thank you so much for stopping buy!

Now, Get Out There and Create Something Amazing!!


Monday, February 5, 2018

Heart Air Balloon - Free Digi

Heart Air Balloon


I went super simple with this card. 

I printed the image out at size and colored it with Prismacolor colored pencils and used gamsol as well. I decided to use rosy peachy pinks and light browns to give this image kind of a Victorian feel.

I die cut the image to get the stitched edging and added a few glitter hearts. 

This Heart Air Balloon is a digi stamp that will be sent out to the Strawberry Jude Stamp email subscribers on Wednesday, February 7th.

Subscribe at the bottom of the Strawberry Jude Stamp Blog so that you don't miss out!


Strawberry Jude Stamps is have a moving sale!
 
Everything is 60% off, 
Free shipping over $65.00 

Thank you so much for stopping by!

Now, Get Out There and Create Something Amazing!! 


Thursday, February 1, 2018

Love is in the Air

Love is in the Air


Happy February!!!!

This Heart Air Balloon is a digi stamp that will be sent out to the Strawberry Jude Stamp email subscribers on Wednesday, February 7th.

Subscribe at the bottom of the Strawberry Jude Stamp Blog so that you don't miss out!

I love digi stamps! They are so easy to use!


I  printed the digi image a little smaller so that I could fit other things on my card.
I used the Love is in the Air set for the sentiment on my card. 


I colored everything with Prismacolor colored pencils and Gamsol


I put a wobbler on the back of my balloon!
Check it out in action!!


I also added a few hearts to my back ground as well. 

That was it! 

I will be entering this card in the following challenges:


Thank you so much for stopping by!


We are also currently have a moving sale! 
Everything is 40% off, 
Free shipping over $65.00 
and a free stamp with every order!!!

Now, Get Out There and Create Something Amazing!! 


Monday, January 29, 2018

I Can't Get Enough Of You

I Can't Get Enough Of You


I decided to try the eclipse cards but I just used a Lawn Fawn XOXO die that I had.


I started by using a pearl embossing powder on my watercolor panel. 
Next I colored the panel with some distress oxides.
I used some perfect pearl water and flicked it on the panel.


I trimmed my panel down a size and used my XOXO die on the panel and on a piece of black card stock, the same that I am going to make my base panel for this card. 
The next step was to apply the panel die cut to the black die cut. . . I actually ended up cutting the die out of the black paper one more time to give it enough height.


I cut by black base panel, added my embossed resit panel and adhered it to my card base.
Then I placed my stacked XOXO into the space on the card base. The pieces of the O's that would have been removed did not get any layers behind it and I think that really helped it to stand out better.


I cut a banner from black paper and used the same pearl embossing powder for the sentiment and added it to my card right under my XOXO.

I am entering this card in the Simon Says Stamp Monday Challenge: Resist It.


Now, Get Out There and Create Something Amazing!!


Saturday, January 27, 2018

We Blend Well Together

We Blend Well Together


I love how this card turned out. 
It is nothing special except that I was able to figure out how to have my ScanNCut2 cut out the inside of the blender so I could make it a shaker, so personal victory!

First I colored my images using Prismacolor colored pencils.I knew I wanted to make this have a shaker part in the blender but I am horrible at cutting things by hand! I used my ScanNCut2 to cut the inside of the blender out. . . Long Story, LOL!

Since I was making a shaker card i didn't want to cut out the blender so I used a larger circle die to get a great shaker shape. I used the same die to put my shaker window and my shaker backing. I then put my shaker piece together.

I cut and layered my base panels and also cut a banner for my sentiment and used a matching ink color. I added some hearts to the front of my shaker and my banner. I attached my shaker and my banner to my card then added my little bag of frozen berries.

I am entering this card in the Lawn Fawnatics Challenge: Inspiration Board


Thank you so much for stopping by!

Now, Get Out There and Create Something Amazing!!


Sorry I'm Slow

Sorry I'm Slow


I used Lawn Fawn Year Two set for this card. I stamped the turtle then gave him the hat and present. I colored everything with Prismacolor colored pencils. I used a wink of Stella pen on the hat and on part of his shell to add a little sparkle to this card.

For this card I was going for CAS. . . So hard for me to do, I always wanna fill up the white space and put enamel dots everywhere!!!  I decided to use a patterned paper as a frame around my image to get rid of the white space but still keep is CAS.

I am entering this card in the following challenge:


Thank you so much for stopping by!

Now, Get Out There and Create Something Amazing!!