Showing posts with label Planner Clip. Show all posts

Wednesday, June 23, 2021

Rocket Pop Star Shaker Clip

Rocket Pop Star Shaker Clip


☆☆☆☆☆☆☆☆☆☆☆☆


To make these paper clip shakers I cut two base shapes and one frame.
I cut the acetate with the base shape die and attached it to the frame.


I like my paper clips to sit inside my planner, 
I do not like them when they stick out of the top so that 
is why I attach the pieces to the paper clip like this. 

I placed one base shape in the paper clip and placed a layer of foam tape.
This is how the shaker will attach to the paper clip.
On the smaller one I used hot glue instead of foam tape, either one works well!


I added foam tape to my frame. . .


Added sequins. . . 


and added the backing.


Then I removed all the backing on the foam tape and attached it to the shaker.


For the smaller one I die cut the back from paper covered in washi tape!

.
The big one is about the size of my palm, 
in this picture it is in a B6 planner.
I will use it decorate the inside cover of my planner.


For this card I used the 

☆☆☆☆☆☆☆☆☆☆☆☆

There are more great Sparkle Blends over at the 

You can use my code FAWN10 for 10% off your order.

There is also a Facebook group where you can share 
creations you have made with Sparkle Blends!
Come check it out, share some inspiration!


Thank you so much for stopping by!
Now, Get Out There and Create Something Amazing!!


☆ Facebook ☆ Instagram ☆

Wednesday, August 28, 2019

Kindred Plans : School - Kindred Stamps August Release

Kindred Plans : School

Welcome to Day 3 of the Kindred Stamps 
August 2019 Release sneak peeks!!


I am showing one of the new planner stamp sets,
 Kindred Plans: School


☆☆☆☆☆☆☆☆☆☆☆☆


I created this school themed planner clip!
I love Annie and her backpack!


I used the pencils from the set and created this washi card.
I am always needing extra washi throughout the week, 
I just adore these cute pencils!


Last week was the first day of school for my son, this set was perfect to decorate my weekly planner spread as well. . . Along with a few other planner sets and stickers!

☆☆☆☆☆☆☆☆☆☆☆☆

The entire Kindred Stamps August release will be available Friday, August 30th at 8am PST/11am EST. Be sure to subscribe to the Kindred Stamps blog to see a daily line up of sneak peeks from our amazing Design Team and see the full product release on Friday! Come join the Fan Club and release event to be part of the release fun, and you may just win some Kindred Stamps credit!!

Thank you so much for stopping by!
Now, Get Out There and Create Something Amazing!!


☆ Facebook ☆ Instagram ☆ YouTube ☆

Saturday, March 11, 2017

PLAN WITH ME - MARCH 13 THRU MARCH 19 - LUCKY

PLAN WITH ME - MARCH 13 THRU MARCH 19 - LUCKY


Plan With Me Video For St. Patrick's Day week!

This video is a little different, I am using planner stickers! I normally only use stamps, but I have fallen into the Sticker world, just like I fell into the Stamp world. . . 

Stickers kinda stress me out, I feel like when I use them it takes me a lot longer to do my spread because I don't know where to put them! I am a white space planner so if I get a whole kit there are lots of stickers left over because I don't use them all. . . 

Anyways if I seem a little lost during this video its because stickers throw me for a loop! Crazy I know. . . . 

Thanks for watching my video, if you like it don't forget to give it a thumbs up and follow me over on Instagram!

Now, Get Out There and Create Something Amazing!! 


Friday, March 10, 2017

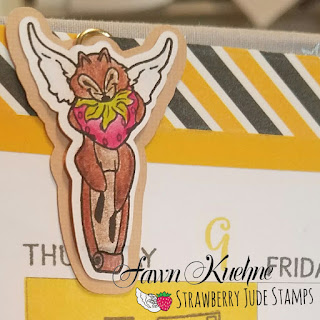
Berry Wings Planner Clip

Sooo. . . . I feel like I just want to make cute little paper clips all of the time! They are super easy and soooo cute!


I made this one using the Berry Wings from Strawberry Jude Stamps. . .


First I stamped him out and colored him using PrismaColor Colored Pencils. Then I used my pix scan mat and my silhouette portrait to cut him out and to also cut out the backing that was a little bit bigger to give it an edge.


I gathered my Supplies. . . .
Paper Clip - Jumbo Size
Scor-Tape
Stamped Image
Backing


First I positioned my backing. I set up the paperclip to have the long portion be the back of my clip. I prefer to have my clip inside my book/binder, not sticking out of the top so that is why I placed my backing as I did. If you wanted the paperclip to stick out above your book/binder your would place your cut out at the top of the paperclip. . .


Next, I added scor-tape to the back of my colored image, and burnished it on really well before removing the tape covering. . .


Then you just center your colored image and press it together really well to make sure it is adhered well!

Seriously!  That is it!


I know I will be making quite a few of these!

Now, Get Out There and Create Something Amazing!!