Tuesday, February 16, 2016

You're A Star

You're A Star

My Card. . . A fantastic little graduation card. 


I used the Lawn Fawn So Jelly Stamp Set


I stamped and clear heat embossed the starfish from the stamp set then colored him with some Distress Ink. I cut this super cute graduation cap with my Explore and colored the top with a wink of stella glitter pen. I colored the tassel with Distress Ink in Fired Brick. He is adhered with a piece of square foam tape.


I created a rainbow stripe patterned to go on the side of my card, I taped off a full sized panel and used Distress Inks to color the stripes. Fired Brick, Spiced Marmalade, Mustard Seed, Mowed Lawn, Salty Ocean, Chipped Sapphire and Seedless Preserves. When I had this ideas I was hoping that I had the right colors and I was lucky, I had the perfect colors! I cut a 3/4 inch stripe for the side of my card. I added a stripe of silver glitter tape cuz I need the sparkle!!!!


Instead of using just plan white paper for the background I dug up something that had a design so it wouldn't be so flat. I then also flicked some Fired Brick droplets to pull the red from the rainbow stripe. I added some red jillibean adhesive sequins and finished by putting on a few Lawn Fawn Lawn Ornaments Wood Veneer Stars and painted them with the Fired Brick as well, Which worked perfectly!

I can't wait to use those cute stars again now that I know I can make them any color I need!


See you next time!

Fawn


One Layer - Paper Smooches - Lucky Stars - SSS Wednesday Challenge

Simon Says Stamp Wednesday February 10th Challenge

One Layer Showcasing Paper Smooches

I Thank My Lucky Stars For You!

My Card. . . 


I heat embossed my sentiment from a Hero Arts stamp set with versa mark embossing ink and Ranger Liquid Platinum embossing powder, I also embossed a strip down the side, kinda looks like a piece of glitter tape. . .  


I used Paper Smooches Stars die set to die cut the stars out of paper that had a layer of scor-tape on it. After the die cut I was able to remove the scor-tape backing and apply glitter and rub it in to get it to stick to the shape.  Then I did the same die cut on a piece of white card stock to get the star outlines and on my black panel so that I could inlay the dies in the panel to achieve the single layer. 


I added some matching sequins adhered with glossy accents for finishing touches.


I love working with glitter but I seriously had that stuff all over! Good thing I don't mind!

See you next time!

Fawn

Monday, February 15, 2016

♥ Hello Beautiful ♥ Simon Says Stamp Flickr Challenge #38

Simon Says Stamp Flickr Challenge #38 - Lots of Love

Check out all the great entries!

My Card. . . 


I put a panel of acetate in the middle of the card front, creating a windowed card. 


I used a stamp from the SSS HELLO BEAUTIFUL stamp set that I got in the February card kit. I did a water color wash over the stamp with some perfect pearl water for a litter shimmer. I added small black hearts from the SSS I SEE YOU stamp set. 


On the out side I used a Lawn Fawn border die of little x's on the top and bottom edge of the paper portion of the card. I used the SSS Mini Heart Outline die from the February card kit and die cute hearts out of some glitter washi tape and adhered them to the front.

Super simple and super cute!

See you next time!

Fawn

Tuesday, February 9, 2016

I'm so Very Fawned of You


  Fantabulous Cricut Challenge #269 - Valentine's Day


I decided to join this challenge so that I can also start using my Explore more in my card making.

My Card. . . 


Everything on the card was cut with the Explore except for the hearts. For the back ground I used the scallop rectangle design label from Elegant Edges. and a regular rectangle cut from a pink ombre paper.


I also used it to do the writing, My writing is horrible. I cut the FAWNED and the fawn collar out of glitter paper cuz I love glitter!


 I cut the fawn from Create a Critter. I used a wink of Stella glitter brush pen in brown to make the fawn a bit darker and add some shimmer. I also filled in the eye, mouth and nose with a black sakura glaze pen.

It's an adorable play on my name that I love! 

See you next time!

Fawn


Monday, February 8, 2016

You're A-MAIZE-ING

You're A-MAIZE-ING!

I made this card for one specific challenge but I ended up being able to enter it into 3 challenges as it is that time of year for love and hearts. . . .

My Card. . .


I used the Lawn Fawn Happy Harvest Stamp set.


I used a new to me technique, I think it is called no line stamping or no line water coloring,  not quite sure. You do a second generation stamp of your image then color it in with watercolor. Makes it look like it was just water colored. I though this was going to be difficult but it was a lot easier then I thought! I did that for my crow, corn stalks and ears of corn.


I stamped the scarecrow in Simon Says Stamp Black ink and water colored using Distress Ink. I used a little bit of perfect pearl water on the shirt just to add a bit of sparkle.


I also stamped the sentiment in  Simon Says Stamp Black ink masking off the word MAIZE so that I could stamp that in Distress Ink Mustard Seed.


Then I added a slew of hearts stamped with Distress Ink Picked Raspberry, the tiny heart stamp is from the SSS I SEE YOU stamp set and added some yellowish gold glitter enamel dots from Virginia Turtle.


To complete my card I added a pink ribbon tied into a bow at the top.

I really like this card, I love this scarecrow so much! I think he's adorable!


Challenges:

SSS Wednesday Challenge - Have a Heart 2/3/16

Lawnscaping - Sending Love 2/1/16

Craftin Desert Divas - Hearts 2/7/16


See you next time!

Fawn


Products Used:


Wednesday, February 3, 2016

Sparkle and Shine - Ray of Sunshine - SSS Monday Challenge

Simon Says Stamp Monday February 1, 2016 Challenge 

Ray Of Sunshine

Check out the blog here! Simon Says Stamp Monday Blog Challenge


My Card. . . 


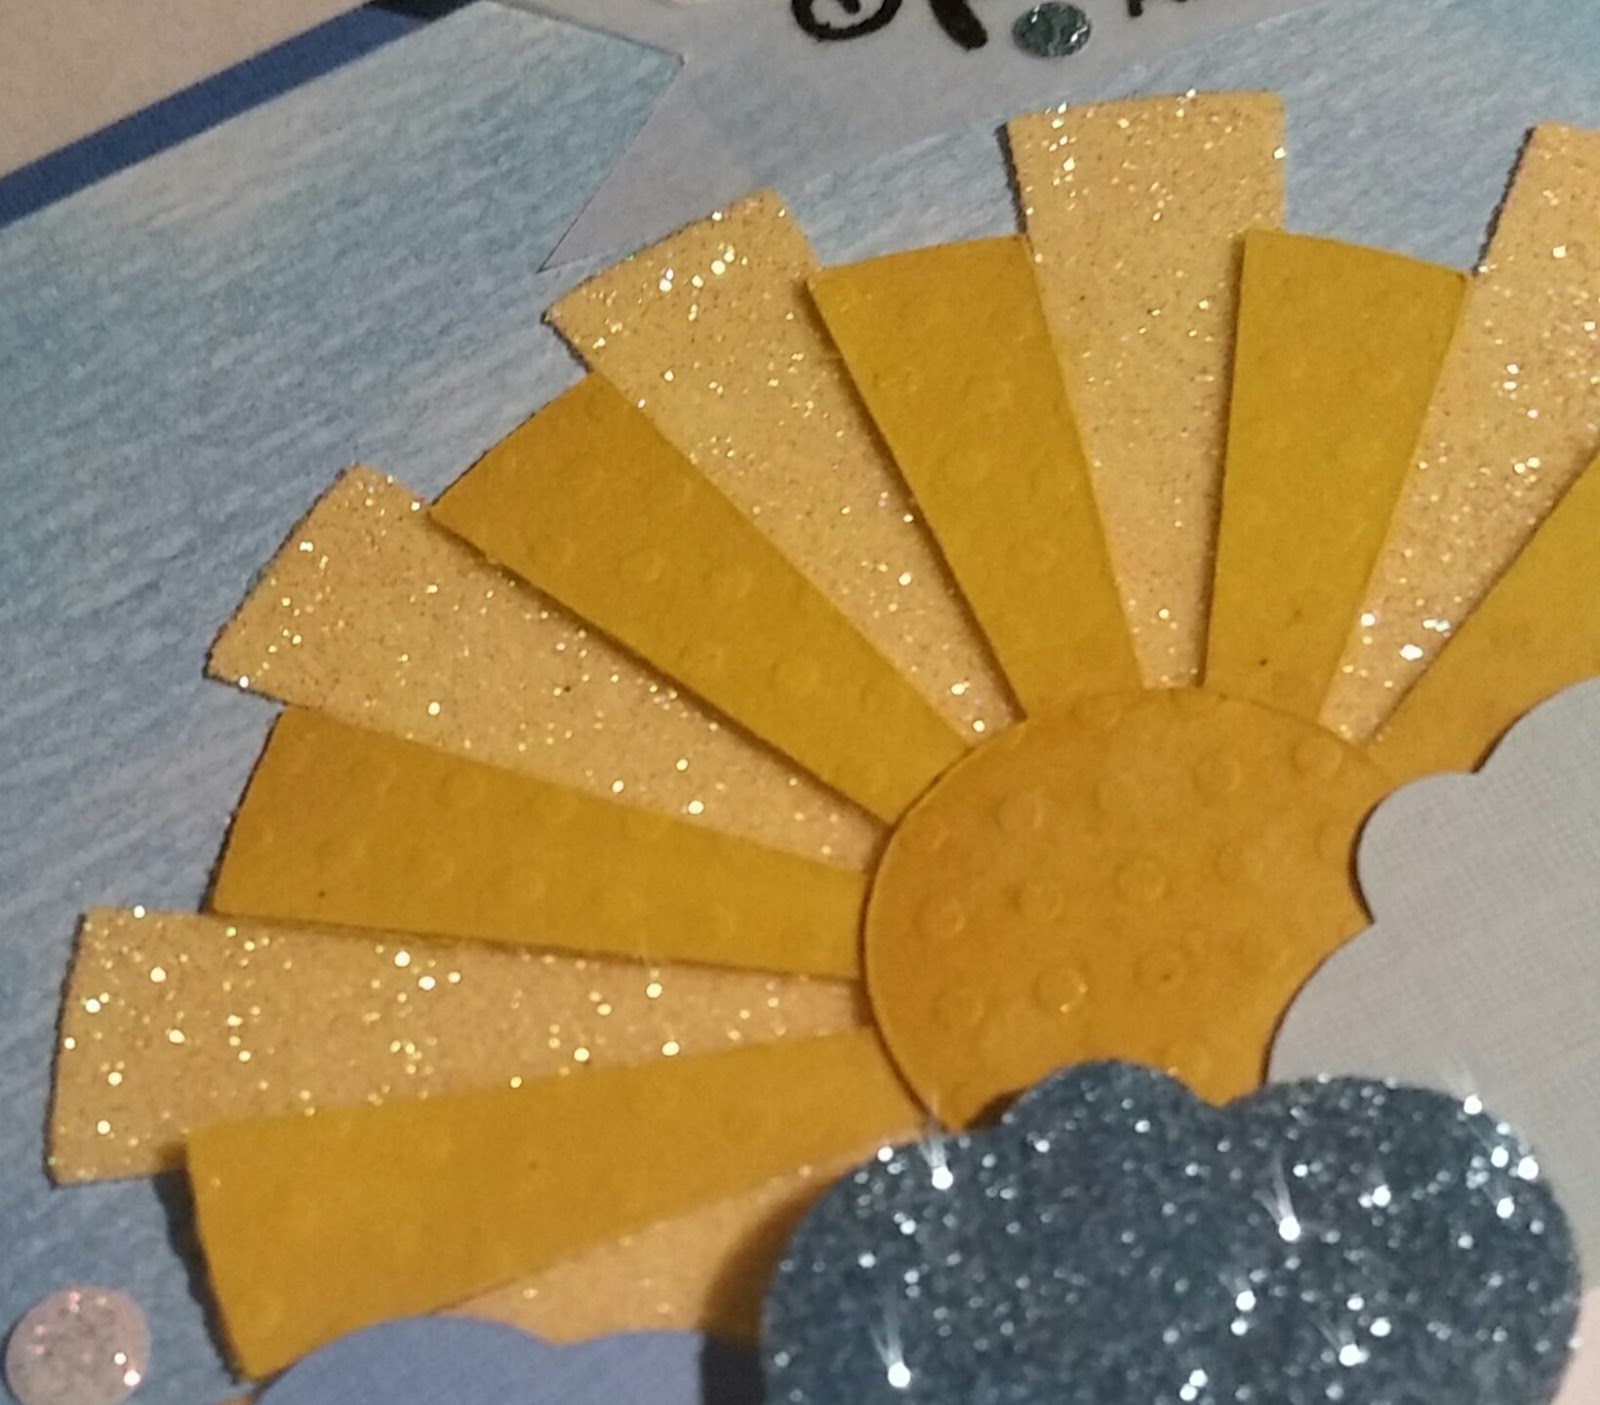
I wanted to do a sparkly sun for this card, but I had none of the great sun die cuts or even stamps so I turned to my Cricut Explore for this card. I cut all three layers of my sun and my cloud with it. The sun I cut out of a yellow polka dot paper and the cloud were cut out of three different shades of blue paper. 


I used a scor-pal sheet to create sticky paper and used it for one of my clouds and the base layer of my card so I could have glittered shapes. You put the scor-pal sheet on regular paper, then cut. You remove the backing paper and apply glitter and rub the glitter into the adhesive and you get a glittered image without messy glue and the glitter stays put, I love it! (I learned this from Jennifer McGuire) I used Recollections extra fine glitter in Sunflower and a blue glitter that I picked up from the Dollar Tree. 

I applied Cats Eye Ink in Canary to the second layer of sun and clear embossed for the shiny look. For the sun center I applied some Distress Ink in Mustard Seed and flicked with water to give it a little texture.


My panel is a 5 x 3.75 watercolor piece, I sponged on some Hampton Arts blue ink for a background and applied my layered sun about 3/4 of an inch from the bottom of the panel. I then placed my clouds at the bottom over lapping and covering the bottom of my sun. I placed the glittered cloud in the front and used some foam adhesive squares for some dimension. I added to strips of blue to my card base and then attached my panel with some foam tape. 


I stamped my sentiment from Virginia Turtle beYOU stamp set on a piece of vellum cut a flag end  and attached to the corner. I finished up with glitter enamel dots from Virginia Turtle.

This card ended up being nothing like my original idea, I couldn't find the supplies I needed for my original idea and ended up changing the orientation half way though, still  LOVE it!

See You Next Time!

Fawn

Monday, February 1, 2016

Hello Friend - Anything Goes - SSS Wednesday Challenge

Simon Says Stamp Wednesday 1/27/16 Challenge

Anything Goes

 Check out the blog here! Simon Says Stamp Wednesday Blog

My Card. . . . 

I used a base panel of watercolor paper just because I wanted it to be nice and sturdy, and added a panel of Lawn Fawn Jack - o - Lantern diagonal stripe cut to 5.25 x 4 and centered it on my base panel with a strip of blue slightly off set.

My white circle is also watercolor paper cut with a circle die. I did some blue watercolor using Distress Ink in Salty Ocean, I used a straw to blow around puddles of color, and also added some orange flecking with Color Box Cat Eye in Orange. I think I liked this technique better then the ink smooshing.


I used the jellyfish and starfish from the Lawn Fawn So Jelly stamp set, stamped in SSS black dye ink and clear heat embossed. I colored those in also with Distress Ink, Salty Ocean and Chipped Sapphire for the jellyfish and Mustard Seed and Spiced Marmalade for the the starfish. I also added a few layers of clear wink of stella, hard to tell in the photo.


I used two Simon Says Stamp sentiments that came in the SSS card kit from the Hello Beautiful stamp set. I used the Hello, from the Hello Beautiful stamped in Versa Mark ink and white heat embossed and then the Friend Stamp, stamped in SSS black dye ink and clear heat embossed. I colored it in also with Distress Ink, Salty Ocean, and also added some orange flecking with Color Box Cat Eye in Orange.

I ended with some white glitter enamel dots and a few circle stickers in coordinating colors. Those are my favorite embellishments, Sticko Dimensional stickers - Dots, whenever I find them I buy out whatever there is, which isn't very often. I find them online but they are like $10 a pack!

I really like the colors on this card and adore this little jellyfish!

See you next time!

Fawn


Products used: